There are 10 Design Principles and 3 Content Principles for synced passkeys. To help ensure your end user experiences are easy to use, have your team become familiar with the principles.
- 1. Prompt to create passkeys alongside account-related tasks.
- 2. Associate the unfamiliar (passkeys) with the familiar.
- 3. Use proven passkeys messaging and icons before and after OS dialogs.
- 4. Allow freedom and choice related to passkeys.
- 5. Follow accessibility principles before and after the use of passkeys.
- 6. Use a passkey hero prompt consistently across the customer journey.
- 7. Persist helpful information about passkeys.
- 8. Make passkeys a primary option in account settings.
- 9. Display “passkeys cards” with content to give shape to passkeys.
- 10. Plan your UX in accord with your unique security and business needs.
- 1. Pair passkeys language with wording they know.
- 2. Use clear “handshake” messages before and after OS dialogs.
- 3. Use passkey messaging throughout the customer journey.
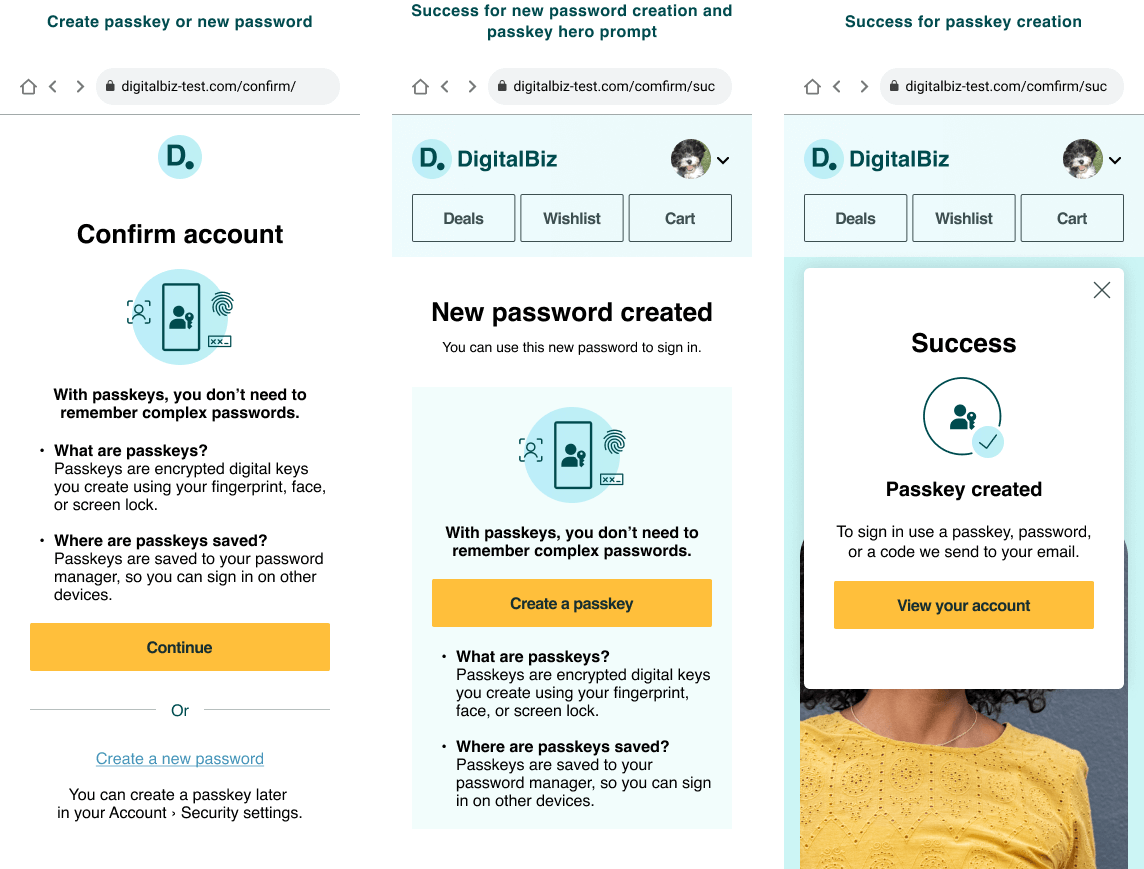
- Screenshots of the “Create account” content
- Screenshots of the “Account recovery” content.
- Screenshots of “Account Settings with and without passkeys.”
UX Principles

1. Prompt to create passkeys alongside account-related tasks.
When people are already in an account management mindset—such as, account creation, account recovery, or as part of account settings—they are more likely to perceive the option to create a passkey as a relevant enhancement to their site experience, rather than an unwelcome interruption or barrier to accomplishing other core site tasks, such as shopping. Prompting to create passkeys during the sign in experience didn’t perform as well.

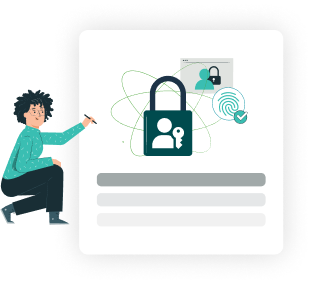
2. Associate the unfamiliar (passkeys) with the familiar.
Passkeys are a new term, a new visual symbol, and a new authentication method for consumers. Whenever possible, help them understand the nature and value of passkeys by associating them to familiar concepts, visuals, and experiences. For example, biometric experiences are familiar.
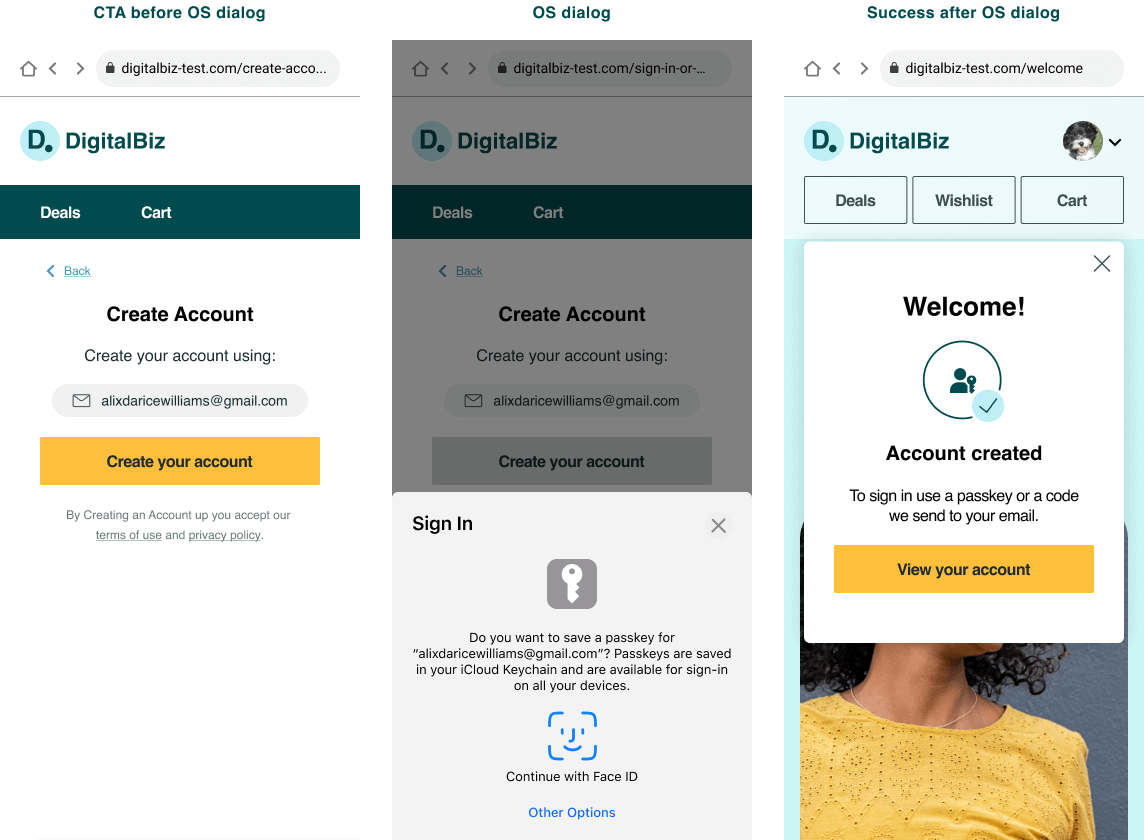
3. Use proven passkeys messaging and icons before and after OS dialogs.
Before triggering the passkeys OS dialogs, display passkeys messages, icons, and actions related to the status of the current task. After the passkeys OS dialogs are completed or dismissed, show the resulting status of the task using messages and icons. This provides a “handshake” between the relying party (RP) website and the OS dialogs and clarifies how the OS and RP are working together to optimize account access and security through passkeys which helps build people’s trust and interest in the new concept of passkeys.

4. Allow freedom and choice related to passkeys.
For consumers to remain in control of their experience and to engender trust with your brand, provide clear options related to creating and managing passkeys. Allow them to create accounts with or without a passkey. Allow them to create a new password upon password reset or create a passkey instead.

5. Follow accessibility principles before and after the use of passkeys.
Passkeys are most accessible when they are presented to users in ways that they can perceive, are operable using assistive technologies, and are understandable to users with a variety of functional needs throughout workflows in their journey with passkeys. Comply with accessibility guidelines such as the Guidance for Making FIDO Deployments Accessible to people with Disabilities and the underlying Web Content Accessibility Guidelines (WCAG).

6. Use a passkey hero prompt consistently across the customer journey.
Create a “hero” for passkeys which includes specific symbols, headline, messaging, and call to action. Consistently use the full hero content at account-related moments in the customer journey. For example, use the complete hero versus using only a “Create passkey” button.
7. Persist helpful information about passkeys.
Keep helpful information about passkeys in the human interface, without requiring additional clicks to see it. For example, retain the passkey “what”, and “where” messages in the hero messaging in account settings even after a passkey is created. Display the text by default and don’t hide it beneath extra clicks. Here’s another example: because people should be given the choice to disable passkeys, but they may not understand how they’ll sign in without them, place the short description of what disabling passkeys will do next to the “Disable passkeys” link. Persist this description in the human interface. For example, don’t put this information in a tooltip that is exposed only upon hover.
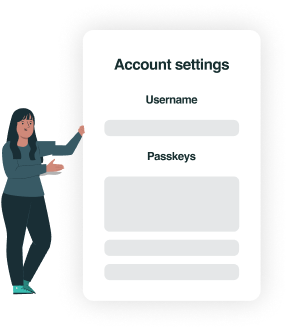
8. Make passkeys a primary option in account settings.
Match the display and interaction model for passkeys with that of other authentication items such as username, password, or 2FA within a person’s Account Settings. For example, if other sign in options within Account Settings are labeled with an H2 heading, then label “Passkeys” with an H2 heading, too.
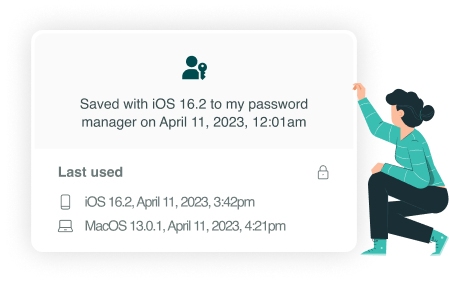
9. Display “passkeys cards” with meaningful content to give shape to passkeys.
Unlike passwords, which are tangible combinations of letters, numbers, and symbols, digital passkeys are largely invisible to people. Display a passkeys card affordance in Account Settings. Inside the card include the passkey icon, messaging, and options that inspire trust and reassures people that their passkeys are active, available, and manageable. If someone has two or more passkeys, each passkey has its own card.

10. Plan your UX in accord with your unique security and business needs.
The guidelines focus on UX concepts that are unique to FIDO with synced passkeys. You will see various forms of identity proofing and non-FIDO authentication examples throughout this work. The guidelines do not intend to prescribe security guidelines for identity proofing or other non-FIDO authentication mechanisms as they are unique to each RP and based on their own unique business needs and security policy. Throughout the guidelines, look for this symbol [ i ] which indicates where your own security policy and business drivers come into play.
Content principles
How do our UX principles apply to content design and strategy? We’re highlighting these three key principles to guide your passkeys content. We’ve also included recommendations showing the language we used in our research. You can borrow the exact content we tested or adapt it to fit your company’s style, voice, and tone.
1. Pair passkeys language with wording they know.
Passkeys are a new concept for many users. Help them understand the value of this new sign-in method by showing how passkeys relate to other methods they already use. For example, “With passkeys, you don’t need to remember complex passwords” or “Passkeys are encrypted digital keys you create using your fingerprint, face, or passcode”.
2. Use clear “handshake” messages before and after OS dialogs.
Help your users feel confident about the OS passkey experience with clear “create account” or “create passkey” messaging before the OS dialog and a confirmation or success message after. This reassures users that your company is working hand-in-hand with the OS to protect their account with passkeys.
3. Use passkey messaging throughout the customer journey.
Use passkey prompts and information across multiple areas of your experience and interface to encourage users to try passkeys at account-related moments in the customer journey — account creation, recovery, and settings. This could range from clearly labeled “create passkey” buttons to detailed “why”, “what”, and “where” passkey messaging.
Create account example content
Copyable content and re-usable design assets for these screens are available in the FIDO Alliance Figma UI Kit.
Create a passkey during account recovery due to forgot password
Copyable content and re-usable design assets for these screens are available in the FIDO Alliance Figma UI Kit.
Account settings
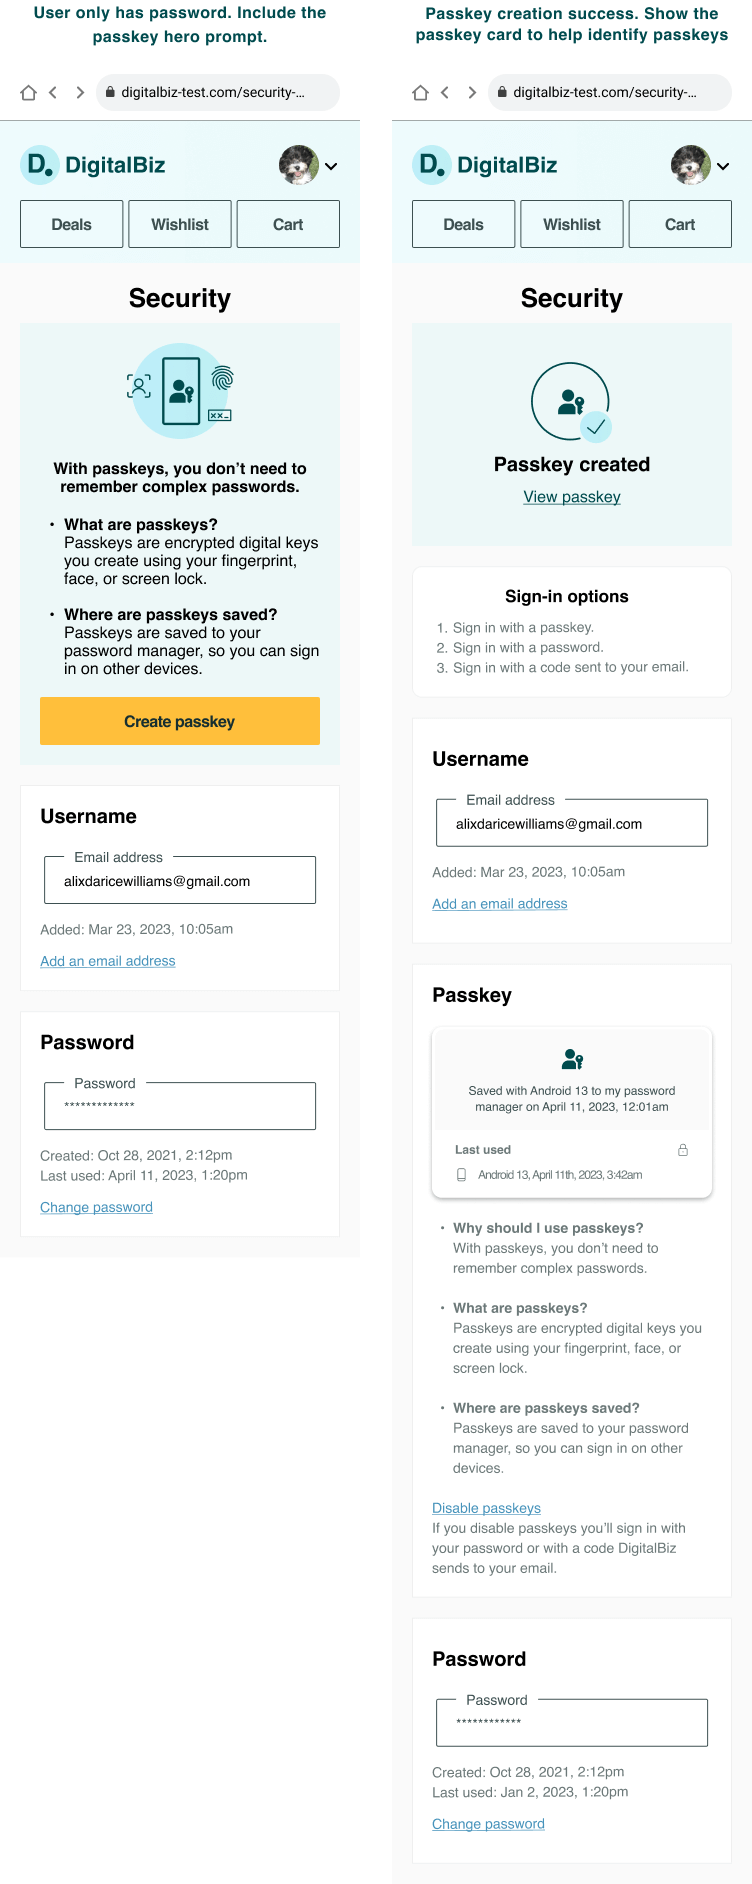
Copyable content and re-usable design assets for these screens are available in the FIDO Alliance Figma UI Kit.